 Creating a
New User Profile
Creating a
New User Profile
1) Click on the “Security"
Section located in the Navigation Bar at the left side of the
application.
2) Click the “User”
item.
3) Click the “New” User icon located in the ribbon bar
at the top of the application.
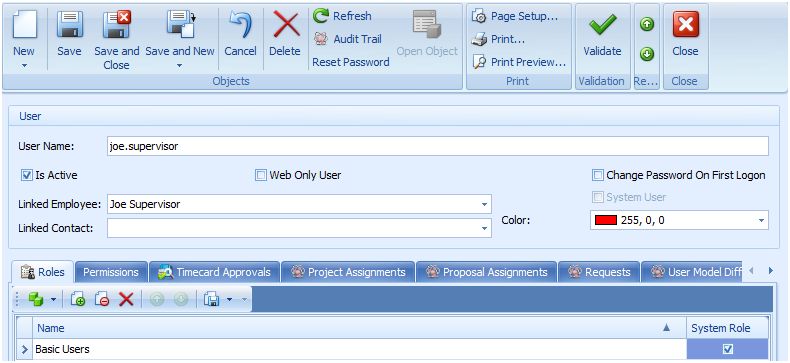
4) Create a User
Name.
![]() Tip: The "User Name" will be used to log in each time the application
is launched. For ease of use, it is recommended that you do not use
capitalization or spaces in your User Name. Commonly used User Names include
first name.last name, i.e., john.smith, first name and last name with no spaces,
i.e., johnsmith, or first initial last name, i.e., jsmith.
Tip: The "User Name" will be used to log in each time the application
is launched. For ease of use, it is recommended that you do not use
capitalization or spaces in your User Name. Commonly used User Names include
first name.last name, i.e., john.smith, first name and last name with no spaces,
i.e., johnsmith, or first initial last name, i.e., jsmith.
5)
If your new user will only be utilizing the web based version of Capriccio
Fuzion and not the web enabled client, then select the “Web Only User” checkbox.
This checkbox will automatically select the correct role that will only give the
new user permissions to access the web based version (the web based version URL
will be supplied in your initial email from your Capriccio Software
representative). All other users will not have the “Web Only User” checkbox
selected.
6) Use the dropdown arrow next to “Linked
Employee” or “Linked Contact” to connect the new user to the appropriate
previously created Employee or Contact record.
7) Click the
“Reset Password” item located in the ribbon bar at the top of the
application.
8) You may use the generic created password or
delete (recommended) the generic password and type in a simple password that
will be given to the new user. Examples of commonly used initial passwords are:
welcome, password, fuzion, and the same text as their User Name. After creating
an initial password, click on the reset password button. The Change Password On
First Login checkbox will automatically be selected. You will supply your new
user with their User Name, password (the initial password you have just
created), and installation URL (or in the case of web only users, their web
based URL). Once they have installed the software(or in the case of web only
users, logged in), the application will prompt them to enter a new password.
9) Before saving your created user, you must add
roles/permissions to their user account.
Next: Roles and PermissionsPrevious: Creating Employees and Contacts